
Arduino: How to Program It: Basics for Beginners
What is Arduino and where to start learning it?
Arduino—programming you can touch. The board allows you not only to work with code but also to implement it in the physical world. For example, you can program the board to blink LEDs or turn it into a musical instrument. We’ll explore how to start programming on Arduino from scratch, which IDEs are suitable for working with the board, and provide code examples.
What is Arduino?
Arduino is a microcontroller-based hardware platform designed for developing smart devices and automated systems. Using Arduino, you can program your own magnetic door lock, build a robot with voice recognition, or assemble an automatic pet feeder. Additional modules from third-party manufacturers can be connected to the main board, equipping the system with a display, sensors, batteries, and wireless communication.
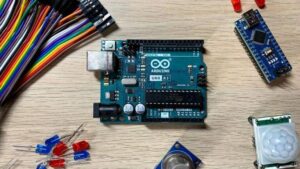
Arduino was invented in Italy in the early 2000s. The system was designed to quickly and easily teach programming and circuit design, so the platform was designed from the start to be flexible so it could be used in any school or club setting.
All Arduino designs are open source, so in addition to the original boards, you can find Chinese knockoffs. The company always publishes the drawings, schematics, and software for its designs. As a result, these knockoffs are practically indistinguishable from boards made in Italy.
What is Arduino programmed with?
Code for all Arduino boards is written in the Arduino language, which is based on C++ and the Wring framework. The platform’s creators chose C++ for its speed and high efficiency when developing for memory-constrained devices. The Wring framework is responsible for controlling the Arduino hardware. Code is compiled using avr-gcc.
Some boards support programming in MicroPython. To do this, you need to manually install the necessary environment and prepare the controller hardware to process such code.
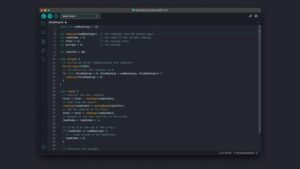
Programming is most convenient in integrated development environments. Arduino boards come with the Arduino IDE. Available for Windows, Linux, and macOS, it brings together all the tools you might need when developing your own projects. In the Arduino IDE, you can write code, optimize board performance, get performance data, install third-party libraries, and develop your own. The Arduino IDE can be downloaded from the company’s official website; the project’s code is open-source and published on GitHub.
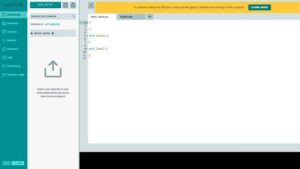
If you can’t install the Arduino IDE, you can program the board in your browser using the cloud development environment . It supports working with code, sending written code to the board, interacting with libraries, and monitoring. The cloud IDE’s capabilities are limited, and for full access, you need to purchase an Arduino Cloud subscription.
You can also develop Arduino code in Microsoft’s Visual Studio Code editor. This is possible thanks to the third-party PlatformIO plugin , which simplifies interaction with the hardware. The plugin is free and provides features for developing, debugging, and flashing the boards.
Arduino Visual Programming
Beginners may find it difficult to immediately begin coding in Arduino C due to the language’s complex C++ foundation. Not all boards support MicroPython, so a visual programming approach based on drag-and-drop can be a solution. This approach is useful not only for beginners but also for children in programming classes.
The Massachusetts Institute of Technology’s S4A project is a modification of the visual programming language for Arduino. It can be used to assemble code blocks into ready-to-use firmware for proprietary boards. The project hasn’t been updated in a while, but it still works reliably. Russian is available, and detailed installation documentation is available.
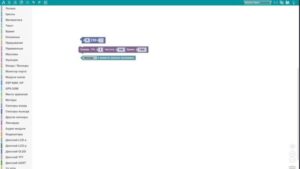
The ArduBlock project , developed by Russian developers, is actively supported and offers up-to-date features for most Arduino and ESP boards. Block-based programming, along with lessons and instructions in Russian, are available in the browser. Together with ArduBlock, the project’s creators also release starter kits for beginners.
Arduino Programming Basics
The Arduino community commonly refers to a project code file as a sketch. Sketches are written according to specific rules that ensure proper operation of the hardware and execution of commands. The basic structure looks like this:
At the very beginning of the sketch, third-party libraries are included in the main file using a directive #includeand the library name. The name can be specified using quotation marks (“”) or check marks (<>). In the former case, the library file is first searched in the sketch folder and then in the folder containing the installed libraries. If you use check marks, the system will search for the specified file only in the folder containing the installed libraries.
Next comes the function setup(), which is executed each time the sketch is run on the Arduino. At this point, the system sets the board’s inputs and outputs to their operating mode, retrieves variable values, and prepares the board for the rest of the code.
The function loop()loops and controls the Arduino. In this section, developers write the main code of the sketch, which implements the logic of the entire project. Execution loop()starts immediately after setup(). These two functions are required in every project sketch, even if the functions contain no instructions. Without them, the code cannot run on the Arduino.
Comments and delimiters
Arduino is programmed in a language based on C++, so it inherits many of its features. For example, single-line comments are specified using double slashes (//). The compiler will ignore all text within a comment; slash-delimited text is typically used to explain how the code works. Comments are primarily for the people writing and using the code, not the computer.
To comment multiple lines at once, use the slash-asterisk construct (/* comment */). This construct must be closed, otherwise the compiler will not be able to find the end of the comment.
All instructions must be separated by a semicolon (;). This feature also came to Arduino syntax from C++. If you don’t do this, the code won’t build and the sketch won’t upload to the board.
Arduino variables
Variables in Arduino, like in all programming languages, are used to store data. When programming Arduino, we must specify the variable type before its name. The following data types exist:
Arduino Operators
Uploading firmware to the board
Let’s imagine we’ve written and debugged the code, now we need to test it on hardware. To do this, we need to somehow send the code to the Arduino board. The proprietary development environment provides a convenient way to flash boards for this purpose.
First, connect the board to the computer via USB. Each generation and type of Arduino uses its own connection standard. This is important to keep in mind. In the running IDE, expand the list and find the board.
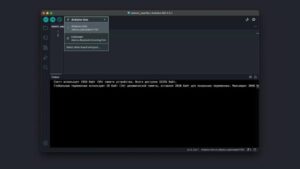
Select and click the button with the arrow icon. The board’s LEDs will start blinking. If the firmware was successfully flashed, a message will appear in the terminal.
Let’s blink the LED
In the programming world, it’s common to display “Hello, World!” as the first program. In the Arduino world, a tradition has developed of blinking an LED located on the board. Beginners use this sketch to begin learning microcontroller programming, while professionals use it to check boards for defects.
To begin working on the project, launch the Arduino IDE. The required sketch is included in the IDE’s example library. You can find it under File → Examples → 01. Basics → Blink. Once selected, the code will appear in the editor window, the first lines of which are replaced by an extensive comment describing the project. You can delete this comment immediately to avoid it getting in the way. Let’s examine the code in detail:
In the function, setup()The LED_BUILTIN pin is configured as an output. This means we won’t receive anything through it and will only use it to transmit parameters. Pins LED_BUILTIN and 13 are connected. Replacing LED_BUILTIN with 13 in the code won’t change anything.
This function loop()is used to control the pin we initialized above. First, we apply 5 volts to it using HIGH, pause for 1000 milliseconds using delay(), and then remove the voltage. The function loop()repeats in a loop, so all instructions in the code will execute as long as the board has power.
Assembling a piano
We already know almost all the theory behind Arduino programming and even tried writing our own “Hello, World!”, so now we can move on to more complex projects. Let’s try building a simple musical instrument similar to a piano.
Scheme
The project’s schematic is very simple, and to assemble it you’ll need three buttons, three 10kOhm resistors, a buzzer, and a bunch of connecting wires. We’ll be assembling the circuit on a breadboard. This makes prototyping faster and eliminates the need to re-solder everything with each new version of the circuit.
All elements should be connected in the following sequence, observing the pin order:
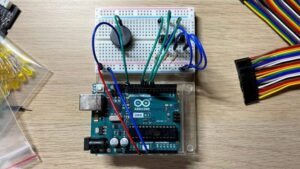
Code
The entire project code looks like this:
You can immediately retype it into the development environment and try uploading it to the board. If everything is successful, a sound will play when you press the buttons. Now let’s examine the code in more detail.
At the very beginning, we define names for the pins we’ll be using. This is done using the directive #define. Then, we specify the name in capital letters and the pin number on the Arduino board. That’s it! After this, we can access the pin in our code by its name, not its number. This is especially convenient for large projects when it’s difficult to remember which pin does what.
Next comes the familiar setup() function. Here we perform the preliminary board settings. In this project, we set the buzzer pin to output mode because we won’t be receiving anything through it. We need to emit sound.
It’s important to note that all pins operate in input mode by default. Therefore, we don’t specify that each pin is used as an input in the project.
Now comes the most important part of the code—the function loop(), which executes all the logic. In the case of the piano, we loop through all the buttons in a for loop. Knowing the button number, we calculate its pin. Then we read its value to find out whether the button is pressed or not. If it is pressed, we play a sound. To read the button value, we use the function digitalRead(), and to play the sound, we use tone().
Result
- Programming Arduino isn’t as difficult as it might seem. The platform’s developers have made every effort to make it easy to write code, rather than figuring out how the board works.
- Arduino has been around for many years and is actively supported by the community, so you can find libraries to solve almost any problem.
- The platform is also supported by third-party manufacturers, so you can find a wide range of sensors, probes, and modules in stores that expand the capabilities of Arduino.
- Developers are developing not only the platform itself, but also the tools for working with it.
Explore More IT Terms
#
- Using an integrating factor
- Equations in total differentials
- Bernoulli's equation
- Linear differential equations of the first order
- 10 Mixed C++ Challenges to Test Your Skills
- 11 Tricky Non-Technical Questions to Ask in a Recruiting Interview
- 50 Terms Every Programmer Should Know
- 52 Java Thread Interview Questions
- 7 Levels of Using the Zip Function in Python
- 7 Python Code Bugs You Need to Fix
- 70+ Free Resources for Learning Programming
A
- A Comprehensive Guide to HTML and CSS
- A Comprehensive Guide to MODX CMS
- A computer science question tests your ability to work with IP addresses and network masks
- A Guide to SQL Query Formatting for Beginners
- A/B testing
- Abstract Data Type (ADT)
- AES Encryption Algorithm: How It Works and Where It's Used
- Agile
- Algorithm
- Algorithm Analysis
- Algorithm Complexity-Key Points
- Algorithm complexity: deep parsing O(log n)
- Algorithm vs. Program
- Algorithms and Data Structures in C#
- An overview of the C # programming language
- An overview of the Python programming language
- Anaconda Python
- Analysis of graphs and adjacency matrices question
- Android
- Android App Bundle
- Android SDK
- Angular
- Ansible
- Apache
- Apache Airflow
- Apache Kafka
- Apache Tomcat
- App Store
- AppCode
- Applications of microcontrollers: From simple circuits in electronics to complex systems
- Applications of the derivative
- Arduino: How to Program It: Basics for Beginners
- Array-based stack
- ArrayList
- ASCII
- ASP.NET
- Assembly Language Lessons
B
C
- C++ Lessons
- Cache
- Calculating Memory Capacity
- Character sets and encodings
- Characteristics of a good Algorithm
- Circular singly linked list
- Coding Tests with Answers
- Combinational Circuits Solved Questions
- Compiler
- Complexity of algorithms-Tutorial
- Computer Science Fundamentals Test with Answers (47 questions)
- Computer science tests with answers (More than 100 Questions)
- Constants
- Creating a Table in HTML
- Creating Forms in HTML
- Creating Lists
- Cybernetics and informatics
- Cycles
D
- Data Analytics: applications of data analysis in companies
- Data Engineer - Who is it, what does a data engineer do, and an overview of the profession
- Data modeling: what it is, types, and process steps.
- Data preprocessing: a complete guide for beginners and professionals.
- Data structure
- Data Structures and Algorithms (DSA)
- Data types vs. Data structures
- Database Tests with Answers
- Deep Learning
- Defining Aliases
- Defining Arrays
- Deque
- Detailed articles and tutorials on PHP
- Developing a Website from Scratch
- Differential Equations
- Differentiation of functions
- Digital data: understand the importance of this asset for businesses.
- Double integrals
- Doubly linked lists
- DSA Tutorial
E
F
G
H
- Handling errors and exceptions
- Heads or Tails? How Probability Theory Is Used in IT
- History of the development of computer science
- Homogeneous equations
- Homogeneous vs. non-homogeneous structures
- How to effectively organize your workflow
- How to Learn Java: Tips for Beginner Developers
- How to Learn PHP: A Beginner's Guide
- How to Use S3 Storage in Kubernetes with CSI
- HTML
- HTML and CSS: Definition, Application, and Operating Principles
- HTML and CSS. Layout from Scratch: What to Learn, Where to Learn, and How Long Will It Take?
- HTML Frame Structure
- HTML Link Formatting
- HTML Quizzes with Answers
I
- if..else construction
- Infinite sequences and series
- Information properties
- Inheritance in Java: A Complete Guide to Principles and Implementation
- Inserting an Image
- Integration of functions
- Interactive Python Tutorial – Learn Programming from Scratch
- Interpreter
- Interview Problem: Finding a Deleted Element in O(N)
- Interview Scare: The FizzBuzz Challenge
- Introduction to C++
- Introduction to Machine Learning
- Introduction to Networking | Network Fundamentals Part 1
- Introduction to Number Systems (Binary, Octal, Hexadecimal) | Math for CS Foundations #1
- IT Specialist Resume (CV)
J
K
L
M
- Machine Learning
- Machine Learning Basic Tool: NumPy
- Machine Learning Basic Tool: Pandas
- Machine Learning Mathematics
- Mathematics for programmers: what is really needed?
- MD5 encryption algorithm: What is it and why is it needed?
- Microcontroller and Microprocessor - what's the difference?
- ML Engineer: Who They Are, What They Do, How Much They Earn, and How to Become a Neural Network Specialist
- Monte Carlo Simulation: How It Works and What It's For
O
P
- PHP lessons
- Private DNS server and its configuration
- Program code
- Programmer's Dictionary
- Programming
- Programming with pseudocode
- Python Code Formatting Guide: PEP8
- Python for data analysis: how to do it and main libraries
- Python Lessons
- Python Superstar: 5 Ways to Use the * Operator
- Python vs. Julia: Should You Replace Python with Julia?
R
S
- SFML Graphics Library Tutorials
- Sorting Algorithms in Programming: Types, Descriptions, and Comparisons
- SQL commands: see what they are, what the main ones are + examples
- SQL Interview Questions and Tasks
- SQL Lessons
- SQL Stored Procedures
- SQL Syntactic Sugar: The COALESCE Function
- Stack
- Start in analytics: Python or R
- Static vs. dynamic data structures
- Statistical analysis: importance for decision making.
- String formatting in Python
- Structure of computer science
- Swift Lessons
- switch/match construct
- Syntax
T
- Terms in programming
- Text and paragraph formatting tags
- The Complete Guide to Bootstrap
- The Complete Guide to JavaScript
- The concept of information and its transmission
- The Future of Python: Key Trends and Insights from Global Researc
- The Infrastructure of Code: A Complete Guide to Repositories for Languages, Frameworks, and Compilers
- The pip package manager in Python
- The role of informatization in the development of society
- Transfers
- Tricky Java Questions Often Asked in Interviews
- Tutorials / Articles
- TypeScript: What It Is and Why Developers Need It
W
- What are databases, and why do they need DBMS and SQL?
- What do Linux distributions consist of?
- What is .NET and what is it used for?
- What is a data structure?
- What is a GPU in a computer, in simple terms?
- What is a quantum computer: 100,500 problems in one second
- What Is an Algorithm?
- What is Arduino: How it Works and the Platform's Capabilities
- What is Big Data? Introduction, Types, Characteristics, and Examples
- What is FizzBuzz Challenge?
- What is Golang and what is it used for?
- What is Haskell and what is it used for?
- What is Kotlin and what is it used for?
- What is Linux? The History of Linux
- What is machine learning, and how does it work?
- What is Power BI: everything about the data analytics software
- What is recursion, recursive and iterative process in programming?
- What is the C++ programming language?
- What is the OSI Model: A Complete Explanation of the Seven Layers and Their Role in Networking
- What's the difference between x86 and ARM processors?
- Where to start learning the C programming language?
- Which Linux distribution should you choose? A Linux distribution overview